
How can I use an eLearning storyboard to improve the courses I create?

Listen to Neovation’s Demystifying eLearning podcast generated with NotebookLM!
Listen to our podcast on your favorite platform!
Think about some of the greatest movies ever made.
The Godfather, The Lord of the Rings, The Matrix…
What do they all have in common (besides starting with the word “The”)?
Like most films, before they became cinematic masterpieces, they were simply storyboards – a visual map used in the filmmaking industry to plan and organize scenes before shooting.
I know, I know. What does this have to do with corporate eLearning? Storyboarding sounds like a tool reserved exclusively for Hollywood studios.
But would you believe me if I told you that you don’t have to work with Coppola, Wachowski, Jackson, Lucas, or Spielberg to utilize a storyboard?
What if I said a storyboard is also an instructional design tool essential to learning and development?
In this article, we'll cover everything you need to know about eLearning storyboards and how they can help your organization create better eLearning courses. As we navigate the wonderful world of storyboards for eLearning courses, we’ll review topics like:
- What is an eLearning storyboard?
- Why do instructional designers use an eLearning storyboard?
- What components should you include in your eLearning storyboard?
- What are some tips for creating an effective eLearning storyboard?
And, of course, I’ll walk you through our handy step-by-step guide to creating effective eLearning storyboards.
(We may even have a free storyboard template waiting for you at the end of this article – be sure to stick around!)
So, without further ado, let's take a closer look at what eLearning storyboards are and how they can help improve the courses you create for your organization.
What is an eLearning storyboard?
An eLearning storyboard is a visual representation of an eLearning course's content.
Just as a film director uses storyboards to plan every shot, every angle, and every detail of a movie, you can use an eLearning storyboard to outline the structure, content flow, visual design, and interactivity of a proposed training course. eLearning storyboards typically include sketches, descriptions, and notes representing the course's content, learning objectives, and instructional strategies.
It essentially acts as a blueprint for your eLearning course, helping you and your instructional design team map the learning journey, identify potential gaps or redundancies, and ensure all learning objectives are covered.
But what does an eLearning storyboard look like in a practical sense?
A practical look at eLearning storyboards
Well, imagine your leadership team asks you to roll out a new compliance training program for all employees. You reach out to your dedicated partnership agency to assist in creating some new courses.
Of course, your instructional design team is perfectly capable of creating an eLearning storyboard for you. But for the sake of this example, let’s say you prefer to provide them with an outline of the compliance course's structure and content, including the learning objectives, assessments, and multimedia elements.
That’s where your storyboard comes in.
As you start to map out the learning journey, your storyboard might follow a pattern that looks something like this:
Scene 1: Introduction
- Frame 1: Title screen, with company logo and course title
- Frame 2: Voiceover introduction, explaining the importance of compliance regulations and the purpose of the course
- Frame 3: Visual representation of the consequences of non-compliance, such as fines, legal action, and damage to reputation
Scene 2: The basics of compliance
- Frame 1: Definition of compliance, including examples and terminology
- Frame 2: Explanation of the role of employees in compliance, including responsibilities and obligations
- Frame 3: Interactive quiz, with multiple-choice questions and feedback
Scene 3: Key compliance regulations
- Frame 1: Overview of the primary compliance regulations relevant to the organization, such as HIPAA, or GDPR
- Frame 2: Detailed explanation of each regulation, including requirements, penalties, and compliance procedures
- Frame 3: Visual representation of the impact of non-compliance on your organization and its employees
Scene 4: Conclusion
- Frame 1: Summary of the course content and learning objectives
- Frame 2: Quiz assessment, with random questions and passing grade
- Frame 3: Final screen, with company logo, copyright notice, and feedback option
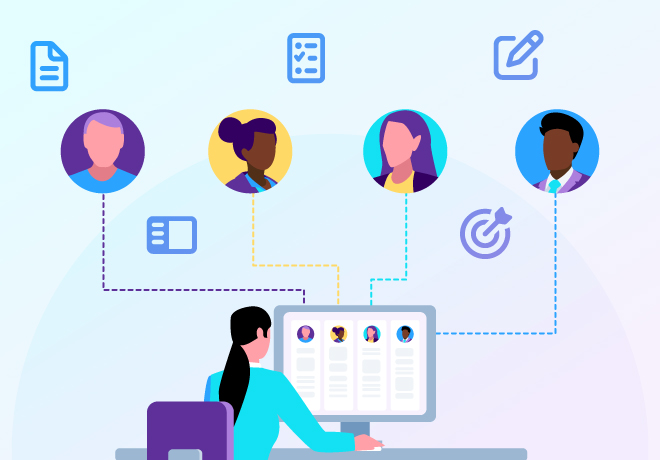
Once your storyboard is complete, it can serve as a blueprint for the course development team, including graphic designers, developers, and subject matter experts. The graphic designers can use the storyboard to create visual assets such as icons, illustrations, and animations, while developers can use it to build the course structure and interactions.
As the course comes together, your instructional design team can use the storyboard to review and provide feedback, ensuring the course stays on track and meets the intended learning outcomes.
And just like a director uses a storyboard to guide the filming process, instructional designers can use it to guide the course development process.
Now, I know time is money. So I get it if you’re thinking: “Is eLearning storyboarding the best use of time, though? It can feel like a large time investment in something that isn’t a finished product. Wouldn’t it make more sense to schedule a kick-off call to review the main components of the course and then get to work?”
But you know the saying, "failing to plan is planning to fail," right?
While storyboarding may seem unnecessary at first glance, it is an integral part of the planning process for any eLearning course.
Why do instructional designers – or anyone – use an eLearning storyboard?
As mentioned, storyboarding helps course designers organize their thoughts and structure content. But instructional designers also use it to provide a rough course outline to get stakeholders' feedback before moving on to the development phase.
Stakeholders will use storyboards to identify potential risks and make changes before development work begins. With this insight, instructional designers ensure that the courses they create align with organizational objectives and meet the needs of learners, improving the overall effectiveness of eLearning courses.
Once the eLearning storyboard is approved, instructional designers will bring your training course to life!
eLearning designers and eLearning developers will use the storyboard framework to create the visual and interactive elements of the course. In contrast, instructional designers will use it to craft learning objectives, assessments, and activities.
I mean, think about it, a movie director wouldn’t release a film without showing a rough cut to producers and editors for feedback, right? The same applies to corporate training courses.
Storyboards give your leadership and L&D team a chance to review course plans in advance – which can help prevent costly revisions later in the development process and ensure that courses are delivered on time and within budget (something your C-suite will love!)
Not to mention, storyboarding also offers your organization the opportunity to improve the quality of its courses. Some benefits of eLearning storyboarding include:
- Cohesion: Storyboarding is a great way to facilitate collaboration between subject matter experts, instructional designers, and developers. By using a storyboard, everyone can see what needs to be done and work together to create a cohesive course.
- Consistency: By using a standardized format for storyboards, organizations can ensure that all courses follow the same design principles and are consistent regarding navigation, interactions, and multimedia elements.
- Clarity: Storyboarding clarifies what needs to be done and when – which can reduce misunderstandings and errors and ensure the course is completed on time.
- Easy course alteration: By keeping a record of the course structure, content, and interactions, instructional designers can quickly and easily make changes or updates as needed without having to start from scratch.
- Reusability: Once you have created a storyboard for one course, you can reuse it for future courses, saving time and valuable resources and resulting in better training ROI.
What components should you include in your eLearning storyboard?
Now that we have established why storyboarding is essential, let's discuss some critical details you should include in your eLearning storyboard.
Take a look at the example of the storyboard below. What are some of the things you notice?
.png)
This sample of an instructional design storyboard contains essential elements, including:
- eLearning course slide title/name: A brief, descriptive title or name for each screen or slide. Your slide title should be clear and concise and should accurately reflect the content of the screen or slide.
- Screen text: Includes all the written content that will appear on each screen or slide. You should organize screen text in a logical and easy-to-follow sequence, with clear headings and subheadings.
- Multimedia: Refers to the graphics, animations, videos, or interactive elements on each screen or slide. Multimedia should be relevant to your presentation content and carefully chosen to enhance the learning experience.
- eLearning developer notes: Includes any additional notes or comments important for the developer to know when creating the course. Developer notes may include technical specifications, design guidelines, or other relevant information.
- Audio narration script: The script for any audio narration included in the course. Scripts should be written in a conversational tone and timed to match the visuals on the screen. They should also include the sound effects or music you plan to use in the course.

To ensure your storyboard remains clear, organized, and intuitive, you may also want to include additional components like:
- Screen/Slide number: The unique identifier for each screen or slide in the storyboard. It helps to keep track of the order of the screens and slides.
- Navigation: Includes the buttons, links, and other navigational elements used to move between screens or slides. It should be intuitive and easy to use, allowing the user to move forward and backward in the course easily.
- Branching: Refers to the different paths learners can take through the course, depending on their choices or performance. You should design courses to provide a personalized learning experience tailored to your employees’ needs and interests.
A step-by-step guide to creating your eLearning storyboard
Okay – we’ve covered all of the necessary background knowledge, like what a storyboard is, why it’s essential, and the key components every storyboard should have. I think it’s about time to throw you into the deep end and leave you to create a storyboard of your very own…
Just kidding!
Don’t worry – I’m here to walk you step-by-step through the storyboarding process.
Here is our handy guide to creating effective eLearning storyboards. Let’s get started!

Step 1: Define your learning objectives
Before you dive into creating a storyboard, it's crucial to define your learning objectives. What do you want your learners to take away from this course? What skills or knowledge should they gain? Be specific and clear about your goals. Clear learning objectives will help guide your content creation and ensure your course is focused and effective.
Step 2: Identify your audience
The next step is to identify your audience. Who will be taking this course? What is their knowledge level on the topic? What are their learning preferences? Understanding your audience is critical to creating an eLearning course that is engaging and effective.
Step 3: Outline your eLearning content
Once you have defined your objectives and identified your audience, it's time to outline your content. Your outline should include the topics, subtopics, and key points you want to cover in your course. Consider the most important information your learners need to know and prioritize it in your outline.
Step 4: Create your eLearning storyboard template
Now, it's time to create your storyboard template! Your template will help you outline the structure and flow of your course, including the text, graphics, and interactive elements like narration and video. You can create your own, find one online, or download our ready-made eLearning storyboard template, saving you time, resources, and the challenges of developing one from scratch.
With your eLearning storyboard template in hand, you’re ready to efficiently map out your custom training courses. Consider your eLearning storyboard as the blueprint that will help you and your team create the finished product. The more details you’re able to convey through storyboarding, the less effort will be required to complete the courses or modules you want to build.
From an organizational standpoint, eLearning storyboards can
- Ensure all stakeholders are on the same page. If changes are needed, a storyboard is easily updated to accommodate requests, feedback, and concerns until consensus is reached
- Act as a roadmap for the entire eLearning development team so everyone can gain a sense of the course length, complexity, information needed, and level of interactivity before the course build begins
- Remove the additional communication needed between team members, such as visual designers and eLearning developers, who are building your eLearning courses
- Convey your ideas and concepts to your interactivity eLearning developers in a low-cost and low-tech way for them to review feasibility and proof of concept
- Allow other later-stage team members, such as quality assurance personnel, a point of reference to how the course should look and feel should there be issues with the design or build
Step 5: Add multimedia and interactivity elements
Multimedia and interactivity components, such as videos, images, and interactive activities, can significantly enhance the learning experience. But it's essential to use them strategically and not just to add some pizzazz to your course. Consider where multimedia components can add value to your content when creating your storyboard. For example, a video tutorial may help demonstrate a complex compliance process, while an interactive activity can help reinforce a soft skill for your sales team.
Step 6: Write your script for narration
Once you have your course structure, assessment strategy, and multimedia components in place, the next step is writing your script. Your script is the text that will accompany each multimedia component and guide the learner through the course material. When writing your script, it's important to use a conversational tone and to keep the content engaging and interactive. Oh! And don’t forget to keep your learning objectives in mind! Ensure that each section of your script aligns with those objectives.
Step 7: Review, revise, and get feedback!
Congratulations, you've completed your storyboard! But before you hit the publish button, reviewing and revising your work is crucial. Look for any gaps in your content, inconsistencies in your script, and areas where multimedia components may not be necessary.
You may also consider sharing your storyboard with a colleague or team member for feedback. Ask them if the content is clear and engaging. Make any necessary changes based on their feedback. This process may take several rounds of iteration, but creating a compelling and engaging course is worth it.
Additional tips for creating your eLearning storyboards
Now that we've gone over the seven steps for creating an eLearning storyboard, let's discuss some other tips to make a great storyboard even better for your learners!
Keep it simple
Don't overload your storyboard with too much information. Keep it simple and focused on your objectives. Remember, less is often more when it comes to eLearning.
Use visuals wisely
Visuals are great for breaking up text and keeping learners engaged, but use them wisely. Ensure they are relevant to the content and don't distract from the message you are trying to convey.
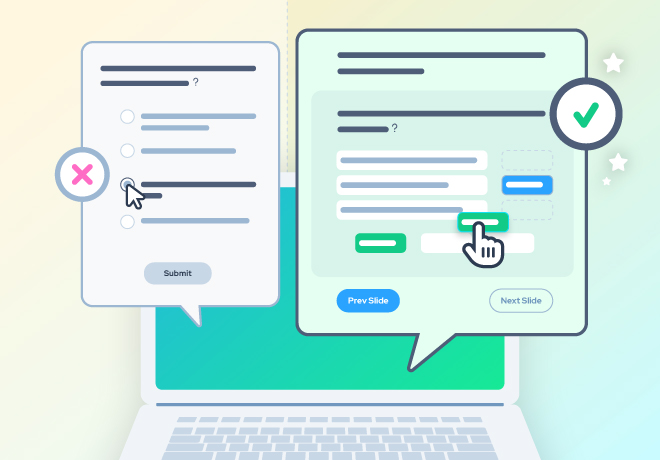
Make it interactive
Interactive elements, like quizzes, simulations, and real-life examples or scenarios, are a great way to engage learners, make your course more relevant, and reinforce learning. Make sure your interactive elements are relevant to the content and not just added for the sake of being interactive.
Test it out
Before you finalize your eLearning course, test it out with a group of learners. The testing process will give you valuable feedback on the effectiveness of your course and any necessary changes you may need to make.
Creating an eLearning storyboard may seem daunting initially. Still, by following these seven steps (and additional tips), you can create engaging, well-organized, and effective corporate training courses for your learners.
And with that, are you ready to take the next step in your storyboarding journey?
Use the same eLearning storyboard template that the pros use – us!
Now that we've explored the ins and outs of eLearning storyboarding, I think you’re ready to start creating your own storyboards.
So, to help you get started, feel free to download the same template the pros use - that's right, us! With this eLearning storyboard template, you’ll be well on your way to creating eLearning content that is captivating, informative, and, most importantly, effective.
Download your copy of Neovation’s eLearning storyboard template
We have two versions available for you to choose from – a PDF document and a PowerPoint file. Select the option that will work best for your workflow – they are the same file, just two different formats – happy storyboarding!
- Neovation’s PDF document – eLearning Storyboard Template with eLearning Content Examples
- Neovation’s PowerPoint File – eLearning Storyboard Template with eLearning Content Examples
Of course, I must admit that, unlike a Spielberg film, your eLearning storyboard may not win you an Oscar. But with careful planning (and the help of a dedicated instructional design team), your eLearning program can still be a (box) office hit with your employees. And who knows? The ROI resulting from more effective courses may even earn you a standing ovation from your C-Suite team!
Ultimately, it doesn’t matter whether you're building your eLearning program from scratch or improving your existing training content. Mapping out your corporate learning journey with an eLearning storyboard is the first step to achieving your goals and desired training outcomes.
Of course, if you’d like to dig deeper into eLearning content development and instructional design, you can always head back to the Learning Hub!
Listen to our podcast on your favorite platform!


-svg.svg)
-svg.svg)
-svg.svg)
-svg.svg)